Blog posts
Category: Tutorial
Using Vagrant to Develop Cockpit
Starting with Cockpit release 0.79 you can use Vagrant to bring up a VM in which you can test or develop Cockpit. The VM is isolated from your main system so any system configuration you change via Cockpit will only happen in the VM.
The Vagrant VM mounts the Cockpit package assets from your git repository checkout, so when you make on the host system, you can refresh the browser and immediately see the resulting changes. For changes to C code, the Cockpit binaries would have to be rebuilt and testing via Vagrant won’t work.
Getting Started
To start, you’ll need Vagrant. On Fedora I use vagrant-libvirt. In addition keep in mind that on
vagrant-libvirt requires root privileges, so you’ll need to use vagrant with sudo.
$ sudo yum install vagrant vagrant-libvirt
Next, in a copy of the Cockpit git repository, you run vagrant up:
$ git clone https://github.com/cockpit-project/cockpit
$ cd cockpit
$ sudo vagrant up
The first time this runs it’ll take a while, but eventually you’ll have a Vagrant VM running. When you do this step again, it should be pretty fast.
The VM will
listen for connections on your local machine’s http://localhost:9090, but
even though you’re connecting to localhost it’ll be Cockpit in the VM you’re talking to.
If you already have Cockpit running on your local machine, then this won’t work, and you’ll need to use the IP address of the VM instead of localhost. To find it:
$ sudo vagrant ssh-config
Two user accounts are created in the VM, and you can use either one to log into Cockpit:
- User: “admin” Password: “foobar”
- User: “root” Password: “foobar”
Testing a Pull Request
If there’s a Cockpit pull request that you’d like to test, you can now do that with the Vagrant VM. Replace the 0000 in the following command with the number of the pull request:
$ git fetch origin pull/0000/head
$ git checkout FETCH_HEAD
The pull request can only contain code to Cockpit package assets. If it contains changes to the src/
directory, then the pull request involves rebuilding binaries, and testing it via Vagrant won’t work.
Now refresh your browser, or if necessary, login again. You should see the changes in the pull request reflected in Cockpit.
Making a change
You can make a change to Cockpit while testing that out in your Vagrant VM. The changes should be
to Cockpit package assets. If you change something in the src/ directory, then binaries will have
to be rebuilt, and testing it via Vagrant won’t work.
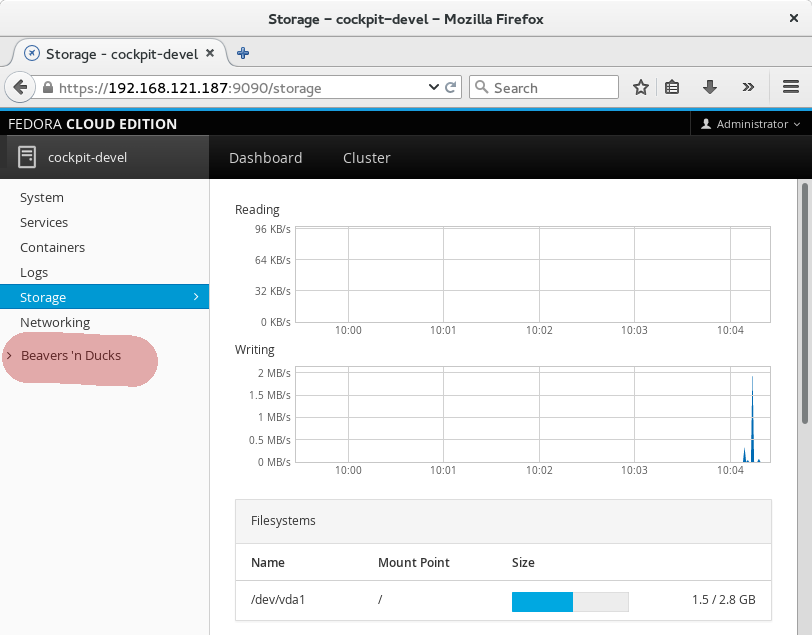
I chose change some wording in the sidebar in pkg/shell/index.html:
          <a data-toggle="collapse" data-target="#tools-panel" class="collapsed" translatable="yes">
-           Tools
+           Beavers 'n Ducks
          </a>
And after refreshing Cockpit, I can see that change:
The same applies to javascript or CSS changes as well. In order to actually contribute a change to Cockpit you’ll want to look at the information about Contributing and if you need help understanding how to add a plugin package you can look at the Developer Guide.
Bringing the Vagrant VM in sync
After each Cockpit release, there will be new binary parts to Cockpit. In order to continue to use the Vagrant VM, you’ll need to rebuild it. A message like this should appear when that’s necessary.
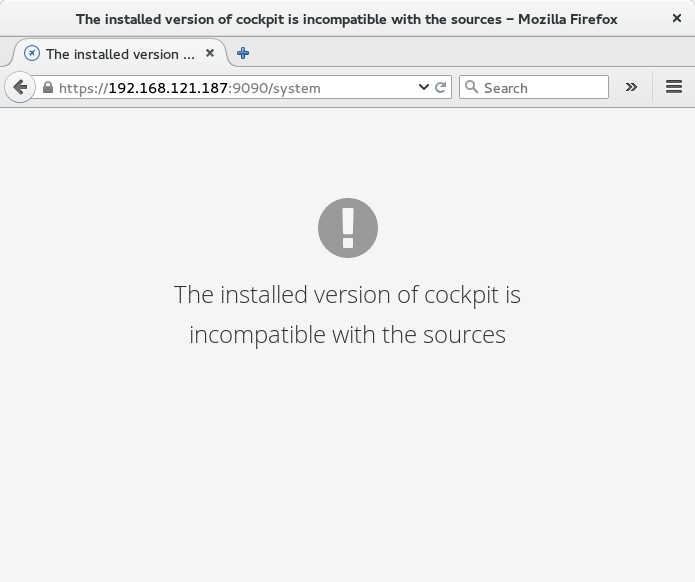
Rebuild the Vagrant VM like this:
$ sudo vagrant destroy
$ sudo vagrant up
Troubleshooting
On Fedora, FirewallD got in the way of Vagrants use of NFS. On my machine, I had to do this to get it to work:
```text $ sudo firewall-cmd –set-default-zone=trusted
Making REST calls from Javascript in Cockpit
Note: This post has been updated for changes in Cockpit 0.90 and later.
Cockpit is a user interface for servers. In earlier tutorials there’s a guide on how to add components to Cockpit.
Not all of the system APIs use DBus. So sometimes we find ourselves in a situation where we have to use REST (which is often just treated as another word for HTTP) to talk to certain parts of the system. For example Docker has a REST API.
For this tutorial you’ll need at least Cockpit 0.58. There was one last tweak that helped with the superuser option you see below. You can install it in Fedora 22 or build it from git.
Here we’ll make a package called docker-info which shows info about the docker daemon. We use the /info docker API to retrieve that info.
I’ve prepared the docker-info package here. It’s just two files. To download them and extract to your current directory, and installs it as a Cockpit package:
$ wget http://cockpit-project.org/files/docker-info.tgz -O - | tar -xzf -
$ cd docker-info/
$ mkdir -p ~/.local/share/cockpit
$ ln -snf $PWD ~/.local/share/cockpit/
Previously we talked about how packages are installed, and what manifest.json does so I won’t repeat myself here. But to make sure the above worked correctly, you can run the following command. You should see docker-info listed in the output:
$ cockpit-bridge --packages
...
docker-info: .../.local/share/cockpit/docker-info
...
If you’re logged into Cockpit on this machine, first log out. And log in again. Make sure to log into Cockpit with your current user name, since you installed the package in your home directory. You should now see a new item in the Tools menu called Docker Info:
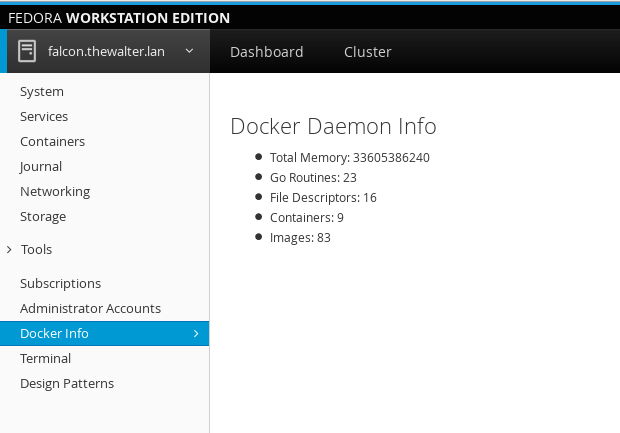
After a moment, you should see numbers pop up with some stats about the docker daemon. Now in a terminal try to run something like:
$ sudo docker run -ti fedora /bin/bash
You should see the numbers update as the container is pulled and started. When you type exit in the container, you should see the numbers update again. How is this happening? Lets take a look at the docker-info HTML:
<head>
    <title>Docker Info</title>
    <meta charset="utf-8">
    <link href="../base1/cockpit.css" type="text/css" rel="stylesheet">
    <script src="../base1/jquery.js"></script>
    <script src="../base1/cockpit.js"></script>
</head>
<body>
    <div class="container-fluid">
        <h2>Docker Daemon Info</h2>
        <ul>
            <li>Total Memory: <span id="docker-memory">?</span></li>
            <li>Go Routines: <span id="docker-routines">?</span></li>
            <li>File Descriptors: <span id="docker-files">?</span></li>
            <li>Containers: <span id="docker-containers">?</span></li>
            <li>Images: <span id="docker-images">?</span></li>
        </ul>
    </div>

    <script>
        var docker = cockpit.http("/var/run/docker.sock", { superuser: "try" });

        function retrieve_info() {
            var info = docker.get("/info");
            info.done(process_info);
            info.fail(print_failure);
        }

        function process_info(data) {
            var resp = JSON.parse(data);
            $("#docker-memory").text(resp.MemTotal);
            $("#docker-routines").text(resp.NGoroutines);
            $("#docker-files").text(resp.NFd);
            $("#docker-containers").text(resp.Containers);
            $("#docker-images").text(resp.Images);
        }

        /* First time */
        retrieve_info();

        var events = docker.get("/events");
        events.stream(got_event);
        events.always(print_failure);

        function got_event() {
            retrieve_info();
        }

        function print_failure(ex) {
            console.log(ex);
        }
    </script>
</body>
</html>
First we include jquery.js and cockpit.js. cockpit.js defines the basic API for interacting with the system, as well as Cockpit itself. You can find detailed documentation here.
<script src="../base1/jquery.js"></script>
<script src="../base1/cockpit.js"></script>
We also include the cockpit.css file to make sure the look of our tool matches that of Cockpit. The HTML is pretty basic, defining a little list where the info shown.
In the javascript code, first we setup an HTTP client to access docker. Docker listens for HTTP requests on a Unix socket called /var/run/docker.sock. In addition the permissions on that socket often require escalated privileges to access, so we tell Cockpit to try to gain superuser privileges for this task, but continue anyway if it cannot:
var docker = cockpit.http("/var/run/docker.sock", { superuser: "try" });
First we define how to retrieve info from Docker. We use the REST /info API to do this.
function retrieve_info() {
    var info = docker.get("/info");
    info.done(process_info);
    info.fail(print_failure);
}
In a browser you cannot stop and wait until a REST call completes. Anything that doesn’t happen instantaneously gets its results reported back to you by means of callback handlers. jQuery has a standard interface called a promise. You add handlers by calling the .done() or .fail() methods and registering callbacks.
The result of the /info call is JSON, and we process it here. This is standard jQuery for filling in text data into the various elements:
function process_info(data) {
    var resp = JSON.parse(data);
    $("#docker-memory").text(resp.MemTotal);
    $("#docker-routines").text(resp.NGoroutines);
    $("#docker-files").text(resp.NFd);
    $("#docker-containers").text(resp.Containers);
    $("#docker-images").text(resp.Images);
}
And then we trigger the invocation of our /info REST API call.
/* First time */
retrieve_info();
Because we want to react to changes in Docker state, we also start a long request to its /events API.
var events = docker.get("/events");
The .get("/events") call returns a jQuery Promise. When a line of event data arrives, the .stream() callback in invoked, and we use it to trigger a reload of the Docker info.
events.stream(got_event);
events.always(print_failure);

function got_event() {
    retrieve_info();
}
This is a simple example, but I hope it helps you get started. There are further REST javascript calls. Obviously you can also do POST and so on.
Protocol for Web access to System APIs
Note: This post has been updated for changes in Cockpit 0.48 and later.
A Linux system today has a lot of local system configuration APIs. I’m not talking about library APIs here, but things like DBus services, command/scripts to be executed, or files placed in various locations. All of these constitute the API by which we configure a Linux system. In Cockpit we access these APIs from a web browser (after authentication of course).
How do we access the system APIs? The answer is the cockpit-bridge tool. It proxies requests from the Cockpit user interface, running in a web browser, to the system. Typically the cockpit-bridge runs as the logged in user, in a user session. It has similar permissions and capabilities as if you had used ssh to log into the system.
Lets look at an example DBus API that we call from Cockpit. systemd has an API to set the system host name, called SetStaticHostname. In Cockpit we can invoke that API using simple JSON like this:
{
  "call": [
    "/org/freedesktop/hostname1",
    "org.freedesktop.hostname1",
    "SetStaticHostname", [ "mypinkpony.local", true ]
  ]
}
The protocol that the web browser uses is a message based protocol, and runs over a WebSocket. This is a “post-HTTP” protocol, and isn’t limited by the request/response semantics inherent to HTTP. Our protocol has a lot of JSON, and has a number of interesting characteristics, which you’ll see below. In general we’ve tried to keep this protocol readable and debuggable.
The cockpit-bridge tool speaks this protocol on its standard in and standard output. The cockpit-ws process hosts the WebSocket and passes the messages to cockpit-bridge for processing.
Following along: In order to follow along with the stuff below, you’ll need at least Cockpit 0.48. The protocol is not yet frozen, and we merged some cleanup recently. You can install it on Fedora 21 using a COPR or build it from git.
Channels
Cockpit can be doing lots of things at the same time and we don’t want to have to open a new WebSocket each time. So we allow the protocol to be shared by multiple concurrent tasks. Each of these is assigned a channel. Channels have a string identifier. The data transferred in a channel is called the payload. To combine these into a message I simply concatenate the identifier, a new line, and the payload. Lets say I wanted to send the message Oh marmalade! over the channel called scruffy the message would look like this:
scruffy
Oh marmalade!
How do we know what channel to send messages on? We send control messages on a control channel to open other channels, and indicate what they should do. The identifier for the control channel is an empty string. More on that below.
Framing
In order to pass a message based protocol over a plain stream, such the standard in and standard out of cockpit-bridge, one needs some form of framing. This framing is not used when the messages are passed over a WebSocket, since WebSockets inherently have a message concept.
The framing the cockpit-bridge uses is simply the byte length of the message, encoded as a string, and followed by a new line. So Scruffy’s 21 byte message above, when sent over a stream, would like this:
21
scruffy
Oh marmalade!
Alternatively, when debugging or testing cockpit-bridge you can run in an interactive mode, where we frame our messages by using boundaries. That way we don’t have to count the byte length of all of our messages meticulously, if we’re writing them by hand. We specify the boundary when invoking cockpit-bridge like so:
$ cockpit-bridge --interact=----
And then we can send a message by using the ---- boundary on a line by itself:
scruffy
Oh marmalade!
----
Control channels
Before we can use a channel, we need to tell cockpit-bridge about the channel and what that channel is meant to do. We do this with a control message sent on the control channel. The control channel is a channel with an empty string as an identifier. Each control message is a JSON object, or dict. Each control message has a "command" field, which determines what kind of control message it is.
The "open" control message opens a new channel. The "payload" field indicates the type of the channel, so that cockpit-bridge knows what to do with the messages. The various channel types are documented. Some channels connect talk to a DBus service, others spawn a process, etc.
When you send an "open" you also choose a new channel identifier and place it in the "channel" field. This channel identifier must not already be in use.
The "echo" channel type just sends the messages you send to the cockpit-bridge back to you. Here’s the control message that is used to open an echo channel. Note the empty channel identifier on the first line:
{
  "command": "open",
  "channel": "mychannel",
  "payload": "echo"
}
Now we’re ready to play … Well almost.
The very first control message sent to and from cockpit-bridge shuld be an "init" message containing a version number. That version number is 1 for the forseeable future.
{
  "command": "init",
  "version": 1
}
Try it out
So combining our knowledge so far, we can run the following:
$ cockpit-bridge --interact=----
In this debugging mode sent by cockpit-bridge will be bold in your terminal. Now paste the following in:
{ "command": "open", "channel": "mychannel", "payload": "echo" }
----
mychannel
This is a test
----
You’ll notice that cockpit-bridge sends your message back. You can use this tecnique to experiment. Unfortunately
cockpit-bridge exits immediately when it’s stdin closes, so you can’t yet use shell redirection from a file effectively.
Making a DBus method call
To make a DBus method call, we open a channel with the payload type "dbus-json3". Then we send JSON messages as payloads inside that channel. An additional field in the "open" control message is required. The "name" field is the bus name of the DBus service we want to talk to:
{
  "command": "open",
  "channel": "mydbus",
  "payload": "dbus-json3",
  "name": "org.freedesktop.systemd1"
}
Once the channel is open we send a JSON object as a payload in the channel with a "call" field. It is set to an array with the DBus interface, DBus object path, method name, and an array of arguments.
mydbus
{
  "call": [ "/org/freedesktop/hostname1", "org.freedesktop.hostname1",
```unknown
        "SetStaticHostname", [ "mypinkpony.local", true ] ],
  "id": "cookie"
}
If we want a reply from the service we specify an `"id"` field. The resulting `"reply"` will have a matching `"id"` and would look something like this:

<pre>
mydbus
{
  "reply": [ null ],
  "id": "cookie"
}
</pre>

If an error occured you would see a reply like this:

<pre>
mydbus
{
  "error": [
```unknown
"org.freedesktop.DBus.Error.UnknownMethod",
[ "MyMethodName not available"]
  ],
  "id":"cookie"
}
</pre>
This is just the basics. You can do much more than this with DBus, including watching for signals, lookup up properties, tracking when they change, introspecting services, watching for new objects to show up, and so on.
Spawning a process
Spawning a process is easier than calling a DBus method. You open the channel with the payload type "stream" and you specify the process you would like to spawn in the "open" control message:
{
  "command": "open",
  "channel": "myproc",
  "payload": "stream",
  "spawn": [ "ip", "addr", "show" ]
}
The process will send its output in the payload of one or more messages of the "myproc" channel, and at the end you’ll encounter the "close" control message. We haven’t looked at until now. A "close" control message is sent when a channel closes. Either the cockpit-bridge or its caller can send this message to close a channel. Often the "close" message contains additional information, such as a problem encountered, or in this case the exit status of the process:
{
  "command": "close",
  "channel": "myproc",
  "exit-status": 0
}
Doing it over a WebSocket
Obviously in Cockpit we send all of these messages from the browser through a WebSocket hosted by cockpit-ws. cockpit-ws then passes them on to cockpit-bridge. You can communicate this way too, if you configure Cockpit to accept different Websocket Origins.
And on it goes
There are payload types for reading files, replacing them, connecting to unix sockets, accessing system resource metrics, doing local HTTP requests, and more. Once the protocol is stable, solid documentation is in order.
I hope that this has given some insight into how Cockpit works under the hood. If you’re interested in using this same protocol, I’d love to get feedback … especially while the basics of the protocol are not yet frozen.
Using DBus from Javascript in Cockpit
Note: This post has been updated for changes in Cockpit 0.90 and later.
Cockpit is a user interface for servers. As we covered in the last tutorial you can add user interface component to Cockpit, and build your own parts of the Server UI.
Much of Cockpit interacts with the server using DBus. We have a powerful yet simple API for doing that, and you should use DBus too when building your own Cockpit user interfaces. For this tutorial you’ll need at least Cockpit 0.41. A few tweaks landed in that release to solve a couple rough edges we had in our DBus support. You can install it in Fedora 21 or build it from git.
Here we’ll make a package called zoner which lets you set the time zone of your server. We use the systemd timedated DBus API to do actually switch time zones.
I’ve prepared the zoner package here. It’s just two files. To download them and extract to your current directory, and installs it as a Cockpit package:
$ wget http://cockpit-project.org/files/zoner.tgz -O - | tar -xzf -
$ cd zoner/
$ mkdir -p ~/.local/share/cockpit
$ ln -snf $PWD ~/.local/share/cockpit/zoner
Previously we talked about how packages are installed, and what manifest.json does so I won’t repeat myself here. But to make sure the above worked correctly, you can run the following command. You should see zoner listed in the output:
$ cockpit-bridge --packages
...
zoner: .../.local/share/cockpit/zoner
...
If you’re logged into Cockpit on this machine, first log out. And log in again. Make sure to log into Cockpit with your current user name, since you installed the package in your home directory. You should now see a new item in the Tools menu called Time Zone:
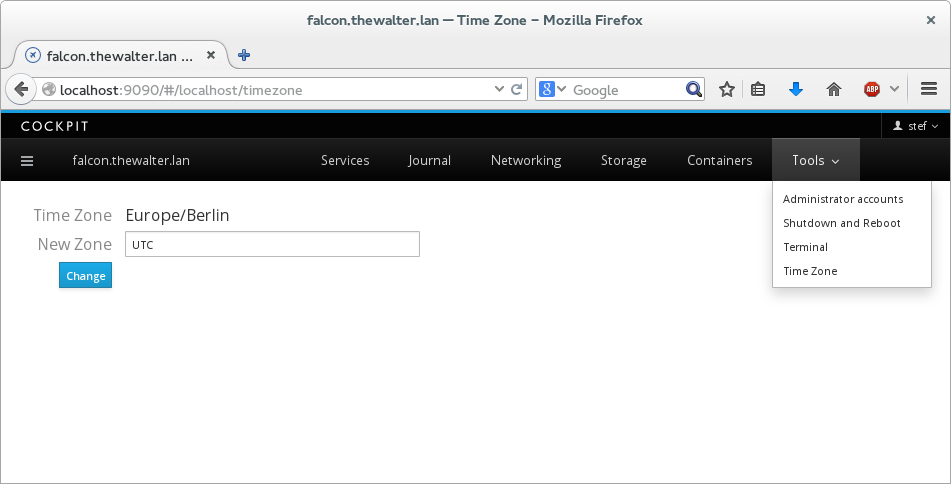
Try it out by typing Australia/Tasmania in the box, and clicking Change. You should see that the Time Zone changes. You can verify this by typing the following on the same server in a terminal:
$ date
Sa 15. Nov 01:48:01 AEDT 2014
Try typing an invalid timezone like blah, and you’ll see an error message displayed. Now try changing the timezone from the terminal using the timedatectl command while you have Cockpit open displaying your Time Zone screen:
$ sudo timedatectl set-timezone UTC
You should see your timezone on your screen update immediately to reflect the new state of the server. So how does this work? Lets take a look at the zoner HTML:
<head>
    <title>Time Zone</title>
    <meta charset="utf-8">
    <link href="../base1/cockpit.css" type="text/css" rel="stylesheet">
    <script src="../base1/jquery.js"></script>
    <script src="../base1/cockpit.js"></script>
</head>
<body>
    <div class="container-fluid" style='max-width: 400px'>
        <table class="cockpit-form-table">
            <tr>
                <td>Time Zone</td>
                <td><span id="current"></span></td>
            </tr>
            <tr>
                <td>New Zone</td>
                <td><input class="form-control" id="new" value="UTC"></td>
            </tr>
            <tr>
                <td><button class="btn btn-default btn-primary" id="change">Change</button></td>
                <td><span id="failure"></span></td>
            </tr>
        </table>
    </div>

    <script>
        var input = $("#new");
        var current = $("#current");
        var failure = $("#failure");

        $("#change").on("click", change_zone);

        var service = cockpit.dbus('org.freedesktop.timedate1');
        var timedate = service.proxy();
        $(timedate).on("changed", display_zone);

        function display_zone() {
            current.text(timedate.Timezone);
        }

        function change_zone() {
            var call = timedate.SetTimezone(input.val(), true);
            call.fail(change_fail);
            failure.empty();
        }

        function change_fail(err) {
            failure.text(err.message);
        }

    </script>
</body>
</html>
First we include jquery.js and cockpit.js. cockpit.js defines the basic API for interacting with the system, as well as Cockpit itself. You can find detailed documentation here.
<script src="../base1/jquery.js"></script>
<script src="../base1/cockpit.js"></script>
We also include the cockpit.css file to make sure the look of our tool matches that of Cockpit. The HTML is pretty basic, defining a little form where the current timezone is shown, a field to type an address, a button to click change to a new one, and an area to show errors.
In the javascript code, first we get a bunch of variables pointing to the HTML elements we want to interact with.
Next we attach a handler to the Change button so that the change_zone() function is called when it is clicked.
$("#change").on("click", change_zone);
Next we connect to the timedated DBus service using the cockpit.dbus() function:
var service = cockpit.dbus('org.freedesktop.timedate1');
Now we make a proxy which represents a particular DBus interface containing methods and properties. Simple services have only one interface. When more than one interface or instance of that interface is present, there are additional arguments to the .proxy() method that you can specify.
var timedate = service.proxy();
Each interface proxy has a "changed" event we can connect to. When properties on the proxy change, or are received for the first time, this event is fired. We use this to call our display_zone() function and update the display of the current time zone:
$(timedate).on("changed", display_zone);

`Timezone` is a property on the [timedated DBus interface](http://www.freedesktop.org/wiki/Software/systemd/timedated/). We can access these properties directly, and the proxy will keep them up to date. Here we use the property to update our display of the current time zone:

function display_zone() {
    current.text(timedate.Timezone);
}

`SetTimezone` is a method on the [timedated DBus interface](http://www.freedesktop.org/wiki/Software/systemd/timedated/) interface, and we can invoke it directly as we would a javascript function. In this case we pass the arguments the DBus method expects, a `timezone` string, and a `user_interaction` boolean.

function change_zone() {
    var call = timedate.SetTimezone(input.val(), true);
In a web browser you cannot block and wait until a method call completes. Anything that doesn’t happen instantaneously gets its results reported back to you by means of callback handlers. jQuery has a standard interface called a promise. You add handlers by calling the .done() or .fail() methods and registering callbacks.
    call.fail(change_fail);
    failure.empty();
}
The change_fail() displays any failures that happen. In this case, SetTimezone DBus method has no return value, however if there were, we could use something like call.done(myhandler) to register a handler to receive them.
Notice that we relied on DBus to tell us when things changed and just updated the display from our event handler. That way we reacted both when the time zone changed due to an action in Cockpit, as well as an action on the server.
Again this is a simple example, but I hope it will whet your appetite to what Cockpit can do with DBus. Obviously you can also do signal handling, working with return values from methods, tracking all instances of a given interface, and other stuff you would expect to do as a DBus client.
Creating Plugins for the Cockpit User Interface
Note: This post has been updated for changes in Cockpit 0.90 and later.
Cockpit is a user interface for servers. And you can add stuff to that user interface. Cockpit is internally built of various components. Each component is HTML, with Javascript logic that makes it work, and CSS to make it pretty.
It’s real easy to create these components. Tools are components that show up in the Tools menu in Cockpit:
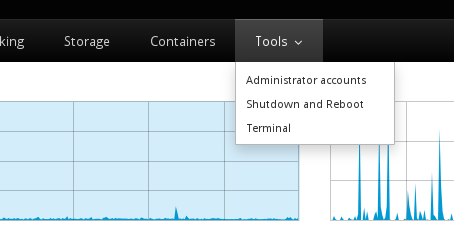
For example the Terminal that you see there is implemented as a tool. But lets make ourselves another one. For this tutorial you’ll need Cockpit 0.41. You can install it in Fedora 21 or build it from git.
So break out your terminal, lets make a package called pinger that checks whether your server has network connectivity to the Internet by pinging another host. Nothing too fancy. We’ll just be spawning a process on the server to do the work. I’ve prepared it for you as an example here, and we can look it over, and modify it. To download the example to your current directory:
$ wget http://cockpit-project.org/files/pinger.tgz -O - | tar -xzf -
$ cd pinger/
Components, and more specifically their HTML and Javascript files, live in package directories. In the package directory there’s also a manifest.json file which tells Cockpit about the package. The pinger directory above is such a package. It’s manifest.json file looks like this:
{
    "version": 0,
    "tools": {
        "pinger": {
            "label": "Pinger",
            "path": "ping.html"
        }
    },
    "content-security-policy": "default-src 'self' 'unsafe-inline' 'unsafe-eval'"
}
The manifest above has a "tools" subsection. Each tool is listed in the Tools menu by Cockpit. The "path" is the name of the HTML file that implements the tool, and the "label" is the text to show in the Tools menu.
You’ll notice that we haven’t told Cockpit about the package yet. To do so you either place or symlink the package into one of two places:
~/.local/share/cockpit
In your home directory, for user specific packages, and ones that you’re working on. You can edit these on the fly and just refresh your browser to see changes./usr/share/cockpit
For installed packages available to all users. These should not be changed while Cockpit is running.
Since we’re going to be messing around with this package, lets symlink it into the former location.
$ mkdir -p ~/.local/share/cockpit
$ ln -snf $PWD ~/.local/share/cockpit/pinger
You can list which Cockpit packages are installed using the following command, and you should see pinger listed among them:
$ cockpit-bridge --packages
...
pinger: /home/.../.local/share/cockpit/pinger
...
If you’re logged into Cockpit on this machine, first log out. And log in again. Make sure to log into Cockpit with your current user name, since you installed the package in your home directory. You should now see a new item in the Tools menu:

The pinger tool itself looks like this:
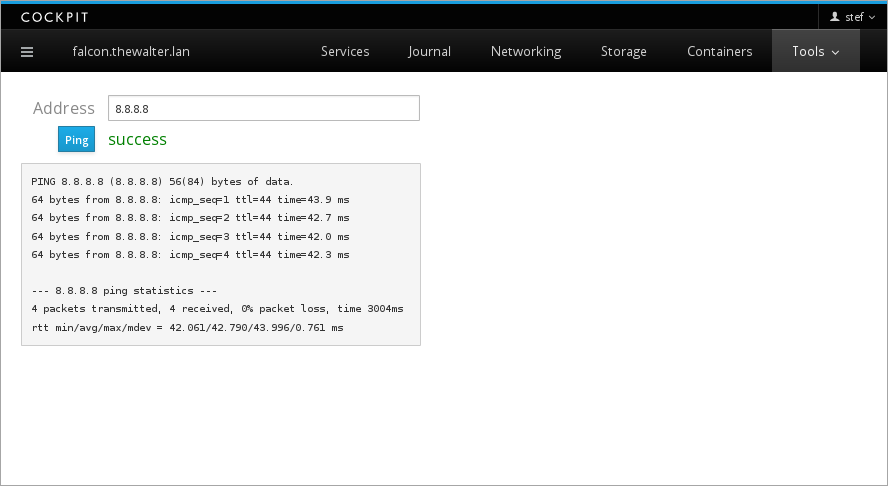
Lets take a look at the pinger HTML, and see how it works.
<head>
    <title>Pinger</title>
    <meta charset="utf-8">
    <link href="../base1/cockpit.css" type="text/css" rel="stylesheet">
    <script src="../base1/jquery.js"></script>
    <script src="../base1/cockpit.js"></script>
</head>
<body>
    <div class="container-fluid" style='max-width: 400px'>
        <table class="cockpit-form-table">
            <tr>
                <td>Address</td>
                <td><input class="form-control" id="address" value="8.8.8.8"></td>
            </tr>
            <tr>
                <td><button class="btn btn-primary" id="ping">Ping</button></td>
                <td><span id="result"></span></td>
            </tr>
        </table>
        <p><pre id="output"></pre></p>
    </div>
    <script>
        var address = $("#address");
        var output = $("#output");
        var result = $("#result");

        $("#ping").on("click", ping_run);

        function ping_run() {
            var proc = cockpit.spawn(["ping", "-c", "4", address.val()]);
            proc.done(ping_success);
            proc.stream(ping_output);
            proc.fail(ping_fail);

            result.empty();
            output.empty();
        }

        function ping_success() {
            result.css("color", "green");
            result.text("success");
        }

        function ping_fail() {
            result.css("color", "red");
            result.text("fail");
        }

        function ping_output(data) {
            output.append(document.createTextNode(data));
        }
    </script>
</body>
</html>
First we include jquery.js and cockpit.js. cockpit.js defines the basic API for interacting with the system, as well as Cockpit itself. You can find detailed documentation here.
<script src="../base1/jquery.js"></script>
<script src="../base1/cockpit.js"></script>
We also include the cockpit.css file to make sure the look of our tool matches that of Cockpit. The HTML is pretty basic, defining a little form with a field to type an address, a button to click to start the pinging, and an area to present output and results.
In the javascript code, first we get a bunch of variables pointing to the HTML elements we want to interact with.
Next we attach a handler to the Ping button so that the ping_run() function is called when it is clicked.
$("#ping").on("click", ping_run);

function ping_run() {
In the ping_run() function is where the magic happens. cockpit.spawn is a function, documented here that lets you spawn processes on the server and interact with them via stdin and stdout. Here we spawn the ping command with some arguments:
var proc = cockpit.spawn(["ping", "-c", "4", address.val()]);
In a web browser you cannot block and wait until a method call completes. Anything that doesn’t happen instantaneously gets its results reported back to you by means of callback handlers. jQuery has a standard interface called a promise. You add handlers by calling the .done() or .fail() methods and registering callbacks. proc.stream() registers a callback to be invoked whenever the process produces output.
    proc.done(ping_success);
    proc.stream(ping_output);
    proc.fail(ping_fail);
    ...
}
The ping_success() and ping_fail() and ping_output() update the display as you would expect.
So there you go … it’s a simple plugin to start off with … next time we’ll cover how to use DBus, and then the real fun begins.